|
agnes & nico designers of embroidery patterns for Christmas balls |
|||||
|
the embroidered Christmas ball We used two plastic chromium plated halve balls, with a diameter of 10 cm. On each halve we embroidered a figure, which are shown on the left and right side.
Below you will find the work instructions for making your own Christmas ball.
It was very difficult to realize the animation because of the reflection into the ball. Finally we succeed by making a tent of bet sheets, in front of our computer. In these tent we hung the Christmas ball. In the reflection off the ball you can see the stand with the web cam. |
|||||
|
We drilled 150 holes for figure 14 we embroidered with: pink, mark Sulky number. 1154 blue, mark Madeira nr. 1177 |
We drilled 252 holes for figure 20 we embroidered with: green, mark Gutermann number. 8220 en 8320 orange, mark Gutermann nr. 3570 |
||||
|
figure 14 (figure14) |
|
figure 20 (figure 20) |
|||
|
work instruction Buy a chromium ball, which exist of two plastic halves that can fix together. We have found one in a store by accident. Cut the pattern into small ribbons, see also the first picture below. Glue this with "post-it" adhesive on the ball-half. "Post-it" adhesive is easily to remove from the ball-half but it is solid enough to keep the pattern on his place during the prick process. Now you prick the pattern over into the ball-half by means of butt pin exactly on the black points from the pattern. Remove the pattern and drill all the indentations by means of a drill of 1 mm.(second picture) Finally you have to smoothen the holes (third picture) Embroider the pattern just like a card, follow the description.
lots of success
|
|||||
|
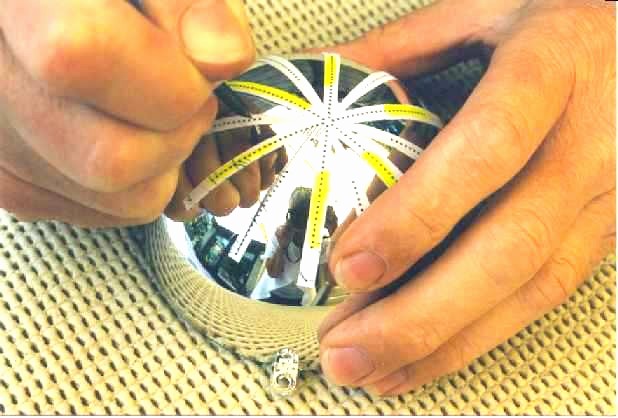
click on the picture
Here you see how the pattern has been placed on the ball-half.
The
indentations are necessary for the exact position of the holes and to
avoid the drill from sliding away over the surface. |
click on the picture
By means of a little drilling machine (model screwdriver) and a drill of 1 mm. we carefully drilled the holes.
|
click on the picture
Finally you remove the burr from the holes at the inside and outside.
Remove
the burr is not always necessary. Look for yourself. |
|||